
Choosing Lvt Vinyl Flooring is more than selecting an attractive color from a showroom display. The right decision depends on room use, subfloor condition, moisture exposure, installation method, and long-term maintenance. A kitchen floor faces spills, dropped cookware, and daily traffic. A bedroom may need warmer visuals and quieter footsteps. These differences matter.
Brett Miller, a flooring educator and technical expert, offers a useful principle: “A floor should support the room, not compete with it.” That idea keeps selection practical. Look beyond surface patterns. Check the wear layer, plank thickness, locking system, slip resistance, warranty terms, and indoor-air certifications. Request samples. View them beside natural and artificial light. A gray plank can appear blue near a window. It happens.
This guide presents ten practical tips for choosing Lvt Vinyl Flooring with greater confidence. It considers appearance, durability, subfloor preparation, water resistance, installation costs, and care requirements. It also addresses details that product photos often hide, including uneven floors, visible seams, and furniture pressure. No flooring guide can predict every household. That is the honest limitation. Still, careful comparison reduces expensive mistakes. Measure twice. Question bold claims. A beautiful floor is useful only when it performs well in the room where it lives.
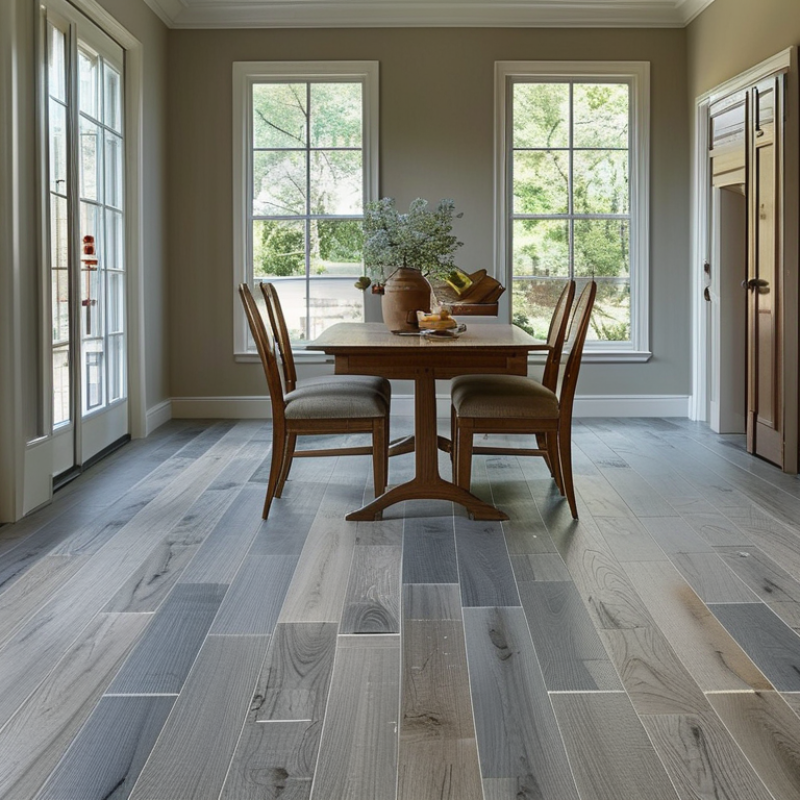
Understanding LVT Vinyl Flooring and Its Main Benefits
Luxury vinyl tile, or LVT, combines a printed design layer, a protective wear layer, and a stable vinyl core. It can imitate oak grain, slate texture, or concrete with surprising detail. Its main benefits include water resistance, simple cleaning, and comfortable underfoot performance. Still, it is not automatically waterproof. Seams and edges need careful installation.
Grand View Research’s 2024 market analysis forecasts a 7.7% compound annual growth rate for global LVT through 2030. The demand reflects practical needs in kitchens, retail spaces, and busy hallways. The U.S. Environmental Protection Agency also reports that indoor pollutant levels can be two to five times higher than outdoor levels. Therefore, choose products with verified low-emission testing, such as compliance with recognized indoor-air standards.
Tip 1: Check the wear layer before judging appearance. Thicker layers usually suit heavier traffic, but they do not fix poor subfloor preparation. Tip 2: Inspect the floor closely. Small uneven areas can telegraph through thin planks. Tip 3: Ask for installation instructions and maintenance limits. Avoid excessive water and harsh chemicals. I would not call LVT indestructible. A dragging chair can still leave a mark. Room temperature, moisture, and proper acclimation deserve attention. These details are easy to overlook.
LVT is valued for its realistic appearance, easy maintenance, comfort underfoot, and resistance to moisture. When comparing products, check the intended use class, wear layer, total thickness, installation method, subfloor requirements, slip resistance, acoustic performance, warranty terms, sustainability information, and cleaning instructions.
Chart data follows the EN ISO 10874 use-class framework: residential classes 21–23, commercial classes 31–34, and light-industrial classes 41–43.
10 Tips for Choosing LVT Vinyl Flooring: Assessing Room Conditions and Installation Requirements
Room conditions should guide LVT selection before color or texture. The U.S. Environmental Protection Agency reports that indoor pollutant levels can be two to five times higher than outdoor levels. Ventilation matters, especially in renovated rooms. Check sunlight, temperature swings, damp corners, and cleaning routines. A south-facing room may need flooring with strong dimensional stability. Bathrooms require careful perimeter sealing, but LVT is not automatically waterproof after poor installation.
The subfloor deserves closer attention. ASTM F710 recommends testing concrete for dryness, cleanliness, and flatness before resilient flooring installation. Relative humidity testing under ASTM F2170 is widely used for concrete moisture evaluation. Many installers also check flatness with a two-metre straightedge. Small ridges can telegraph through thin planks. They become visible under morning light. Do not guess.
In field work, I have seen attractive floors fail because the room was prepared too quickly. LVT should acclimate under the project’s actual temperature and humidity conditions, following the installation specification. Remove dust, old adhesive, grease, and loose particles. Wood subfloors need secure panels and controlled movement. Concrete may need moisture mitigation, not another layer of adhesive. Allow expansion where the system requires it, particularly around door frames and fixed cabinets. One detail is easy to miss: measure the finished floor height against doors, appliances, and transitions. A few millimetres can change the whole installation. Recheck the room. That pause is worth it.
LVT styles now range from quiet wood visuals to crisp stone patterns and herringbone layouts. The 2024 Floor Covering Weekly Statistical Report places resilient flooring at roughly one-quarter of U.S. floor-covering sales. That share reflects practical demand, not automatic quality.
Look closely.
Tip 1: Match the design to the room. Embossed wood textures can hide small marks, while dark stone may show dust quickly.
Tip 2: Compare total thickness with the protective layer. A thicker plank may improve comfort, but it does not guarantee better wear resistance. Commercial specifications often list wear layers in mils. Higher values generally suit busy hallways, kitchens, and rental properties. The real decision is use.
Tip 3: Check the core. Rigid-core LVT can reduce minor subfloor movement, while flexible products may feel softer underfoot.
Tip 4: Read the installation tolerance, not just the thickness. The Resilient Floor Covering Institute’s care guidance stresses clean, dry, level substrates and manufacturer-approved maintenance.
Tip 5: Inspect samples in daylight. Printed visuals can look warmer or flatter at home. I have seen attractive samples fail beside cool lighting.
Tip 6: Treat warranty language carefully. It may exclude moisture, rolling loads, or poor subfloor preparation. A thicker product is not always the wiser purchase.
When choosing LVT, inspect durability before admiring the pattern. Grand View Research estimated the global LVT market at about $24.9 billion in 2023. That growth reflects demand, not guaranteed performance. Check the wear layer thickness, finish type, and commercial-use rating. Thicker layers usually resist scratching better, but installation quality still matters. Review ASTM F970 static-load results for heavy furniture. Examine ASTM F925 chemical-resistance testing for kitchens and utility rooms. Ask for dimensional-stability data, especially near sunny windows. Do not judge durability by thickness alone.
Water resistance needs closer attention. LVT planks may resist spills, while seams can still admit moisture. Confirm whether the product is rated waterproof or only water-resistant. Read the installation instructions carefully. Subfloor moisture testing is essential over concrete. The Resilient Floor Covering Institute stresses proper acclimation, expansion space, and seam preparation. These details prevent avoidable movement and gaps. For maintenance, choose a non-abrasive cleaner approved for resilient flooring. Sweep grit often; sand acts like tiny glass. Use entrance mats, but avoid rubber-backed types unless approved. Clean spills quickly. No floor is maintenance-free. A practical mistake is using too much water during mopping. It may leave residue, dull the finish, or reach vulnerable edges. Ask for warranty exclusions, cleaning limits, and replacement-plank availability before purchasing.
Choosing LVT flooring is less about the lowest price and more about lasting value. Grand View Research estimates that the global LVT flooring market will grow strongly through 2030, reflecting rising demand for durable, design-focused surfaces. Growth does not guarantee quality. Tip 1: Compare wear-layer thickness. Tip 2: Check the product’s total thickness. Tip 3: Read the technical sheet, not only the sales label. Tip 4: Confirm the correct installation method. A thicker wear layer can resist scratches, but it cannot fix uneven subfloors.
Tip 5: Calculate total installed cost. Include adhesive, underlayment, trims, delivery, and waste. Tip 6: Buy extra planks for future repairs. Ten percent is a common planning allowance, although room shape changes the number. Tip 7: Request third-party emissions testing. Tip 8: Review ASTM performance classifications when available. These details offer stronger evidence than attractive showroom displays. A practical mistake is judging color under bright retail lighting. Natural daylight may reveal a cooler or darker tone.
Tip 9: Check cleaning requirements before purchase. Textured surfaces can hide dust but require more careful maintenance. Tip 10: Compare warranty conditions line by line. Exclusions may cover moisture, subfloor movement, or improper cleaning. Reports from the U.S. Environmental Protection Agency emphasize controlling moisture and indoor pollutants, so installation quality matters as much as product selection. The cheapest option may fail this calculation. Yet the most expensive option is not automatically wiser. Balance verified performance, realistic maintenance, and replacement access. Long-term value often looks ordinary at purchase.
| No. | Selection Tip | What to Check | Recommended Range | Budget Impact | Long-Term Value Benefit | Priority |
|---|---|---|---|---|---|---|
| 1 | Compare total installed cost | Include flooring, underlayment, trims, adhesive, delivery, subfloor preparation, and installation. | Get at least 3 written quotes | Medium | Prevents a low material price from becoming an unexpectedly expensive project. | High |
| 2 | Evaluate wear-layer thickness | The wear layer protects the printed design from everyday abrasion and traffic. | Residential: 12–20 mil Heavy use: 20–30 mil |
Medium–High | A suitable wear layer can reduce visible scuffing and delay replacement. | High |
| 3 | Choose the correct construction | Compare flexible LVT with rigid-core options according to subfloor condition, moisture exposure, and room use. | Rigid core for uneven or moisture-prone areas | Medium–High | The right structure can reduce movement, telegraphing, and repair risk. | High |
| 4 | Check dimensional stability | Review installation requirements, expansion gaps, temperature limits, and resistance to seasonal movement. | Follow the stated acclimation and gap requirements | Low–Medium | Better stability helps minimize gapping, buckling, and callbacks. | High |
| 5 | Verify moisture suitability | Confirm whether the product is suitable for kitchens, bathrooms, basements, and other damp areas. | Water-resistant surface; sealed perimeter where needed | Low–Medium | Appropriate moisture protection limits damage to the floor and subfloor. | High |
| 6 | Inspect the click-lock system | Look for consistent joints, clear installation instructions, and a locking profile that resists separation. | Tight, even joints with minimal visible gaps | Low–Medium | Reliable locking can shorten installation time and reduce future joint repairs. | Medium |
| 7 | Assess surface texture and finish | Compare embossing, gloss level, slip resistance, stain resistance, and how easily the surface can be cleaned. | Low-gloss, textured finish for busy areas | Low–Medium | A practical finish can hide minor marks and reduce daily maintenance effort. | Medium |
| 8 | Review indoor-air-quality information | Request emissions documentation and check for compliance with recognized indoor-air-quality standards. | Third-party emissions certification where available | Low–Medium | Verified low emissions support healthier indoor spaces and informed purchasing. | Medium |
| 9 | Calculate waste and future repair needs | Add extra material for cutting waste and keep spare planks or tiles from the same production batch. | Typically 5–10% extra; more for complex layouts | Low | Stored spare pieces make localized repairs easier and improve color matching. | Medium |
| 10 | Read the warranty and care requirements | Check coverage period, exclusions, installation conditions, maintenance rules, and whether commercial use is included. | Coverage aligned with the intended room and traffic level | Low | Clear terms help protect the purchase and prevent avoidable warranty exclusions. | High |
Note: Recommended ranges are general planning guidelines. Always confirm the product’s technical data, installation instructions, local building requirements, and site conditions before purchasing.
: Check sunlight, temperature changes, damp corners, ventilation, and cleaning habits. A sunny, south-facing room needs strong dimensional stability. Renovated rooms may need better airflow. I might focus too much on color. That would be a mistake.
Test concrete for dryness, cleanliness, moisture, and flatness. Use a reliable moisture test, not guesswork. Check flatness with a two-metre straightedge. Small ridges can show beneath thin planks in morning light.
Not automatically. Planks may resist spills, but seams can allow moisture through. Bathrooms need careful perimeter sealing. Follow the exact installation instructions. Water resistance is not a magic shield.
Acclimation lets planks adjust to the room’s temperature and humidity. Keep them in the installation area as specified. Skipping this step may cause movement or gaps. It feels slow. It can prevent rework.
Remove dust, old adhesive, grease, and loose particles. Secure wood panels before laying planks. Concrete may need moisture mitigation instead of extra adhesive. A clean base matters more than it looks.
Check wear-layer thickness, finish type, and the product’s use rating. Review load and chemical-resistance test results for heavy furniture or strong cleaners. Thicker layers usually resist scratches better. Not always.
Compare finished floor height with doors, appliances, and transitions. Leave required expansion space near door frames and fixed cabinets. A few millimetres can change the fit. Recheck everything.
Sweep grit often because sand acts like tiny glass. Clean spills quickly. Use a non-abrasive cleaner approved for resilient flooring. Avoid excessive water when mopping. It may leave residue or dull the finish. Check whether rubber-backed mats are approved. Ask about cleaning limits and replacement-plank availability.
Choosing Lvt Vinyl Flooring starts with understanding its practical advantages, including realistic appearance, comfortable underfoot feel, easy maintenance, and suitability for many residential and commercial spaces. Before selecting a product, assess the room’s moisture levels, subfloor condition, traffic patterns, temperature, and installation requirements. These factors help determine whether a click-lock, glue-down, or other installation method is most appropriate.
Next, compare design options, plank or tile dimensions, overall thickness, wear-layer protection, and surface texture. A durable product with strong water resistance can be valuable in kitchens, bathrooms, entryways, and busy areas, but proper cleaning and prompt spill removal remain important. Finally, balance appearance and performance with your budget. The lowest purchase price may not provide the best long-term value, so consider installation costs, maintenance needs, expected lifespan, and warranty coverage. By evaluating these details carefully, you can choose flooring that suits your space, lifestyle, and financial priorities.
